













































7
10
树莓派手动安装nextcloud搭建私有云(非docker方式)
2020-04-10 18:00:52
10点赞
41收藏
16评论
nextcloud简介
nextcloud前身是大名鼎鼎的owncloud,两者均是开源的网络硬盘系统。nextcloud不仅可以搭建私有云存储和同步数据,也提供联系人、日程管理功能,web端还提供私密的语音视频通话功能。nextcloud致力于数据安全,云端的数据均可选择加密,并遵循安全行业最佳实践。客户端支持windows、macos、linux三大pc平台,以及安卓ios两大移动平台,完全足够家庭或中小型团队协作使用。
部署和设置nextcloud
nextcloud程序由php语言编写,因此部署需要具备php运行环境以及web中间件。因其支持平台众多,官方文档略显繁琐,故本文给出树莓派上用nginx、mariadb、redis搭建nextcloud的详细步骤。
从官网下载部署程序;
更新系统和必备软件:sudo apt update && sudo apt upgrade && sudo apt install -y libreoffice ffmpeg;
安装nginx:sudo apt install -y nginx;
安装redis:sudo apt install -y redis;
安装mariadb:sudo apt install mariadb-server;
安装php及推荐模块:sudo apt install -y php7.3 php7.3-fpm php7.3-curl php7.3-gd php7.3-dom php7.3-iconv php-redis php-mysql php7.3-zip php7.3-bz2 php7.3-intl php7.3-imagick php7.3-mbstring;
如果缺少相关模块,将会在 nextcloud web 开始配置界面提示未安装,根据提示安装缺少的相应模块就可以了。
解压部署程序:unzip nextcloud-xxxx.zip;
将nextcloud文件移动到网站根目录:sudo mv nextcloud-xxx /var/www/html/nextcloud;
创建数据目录,更改目录权限:mkdir /var/www/html/nextcloud/data && sudo chown -R www-data:www-data /var/www/html/nextcloud;
配置php:打开/etc/php/7.3/fpm/php.ini文件,做如下更改:
expose_php改成off
date.timezone 一行删掉前面的;号,值改成Asia/Shanghai
删掉opcache.enable=1,opcache.validate_timestamps=1,opcache.revalidate_freq=2这三行前面的;号,将opcache.revalidate_freq的值改成30;
配置fpm:打开/etc/php/7.3/fpm/pool.d/www.conf文件,移除clear_env=no,env[开头那几行前面的;号(即388,401-405这几行前面的分号);
设置mariadb管理员密码: mysqladmin -uroot password '你的密码';
创建nextcloud数据库:mysql -uroot -p'你的密码' -e 'create user nextcloud@"%" identified by "nextcloud数据库密码"; create database nextcloud default charset=utf8mb4; grant all privileges on nextcloud.* to nextcloud@"%"; flush privileges;';
配置nginx:在/etc/nginx/sites-enabled目录下,创建一个nextcloud文件,其内容如下(注意,本配置中禁用了https):
upstream php-handler {
server unix:/run/php/php7.3-fpm.sock;
}
server {
listen 80;
listen [::]:80;
server_name cloud.example.com;
# enforce https
#return 301 https://$server_name:443$request_uri;
#}
#server {
# listen 443 ssl http2;
# listen [::]:443 ssl http2;
# server_name cloud.example.com;
# Use Mozilla's guidelines for SSL/TLS settings
# https://mozilla.github.io/server-side-tls/ssl-config-generator/
# NOTE: some settings below might be redundant
# ssl_certificate /etc/ssl/nginx/cloud.example.com.crt;
# ssl_certificate_key /etc/ssl/nginx/cloud.example.com.key;
# Path to the root of your installation
root /var/www/html/nextcloud;
location = /robots.txt {
allow all;
log_not_found off;
access_log off;
}
# The following 2 rules are only needed for the user_webfinger app.
# Uncomment it if you're planning to use this app.
#rewrite ^/.well-known/host-meta /public.php?service=host-meta last;
#rewrite ^/.well-known/host-meta.json /public.php?service=host-meta-json last;
# The following rule is only needed for the Social app.
# Uncomment it if you're planning to use this app.
#rewrite ^/.well-known/webfinger /public.php?service=webfinger last;
location = /.well-known/carddav {
return 301 $scheme://$host:$server_port/remote.php/dav;
}
location = /.well-known/caldav {
return 301 $scheme://$host:$server_port/remote.php/dav;
}
# set max upload size
client_max_body_size 512M;
fastcgi_buffers 64 4K;
# Enable gzip but do not remove ETag headers
gzip on;
gzip_vary on;
gzip_comp_level 4;
gzip_min_length 256;
gzip_proxied expired no-cache no-store private no_last_modified no_etag auth;
gzip_types application/atom+xml application/javascript application/json application/ld+json application/manifest+json application/rss+xml application/vnd.geo+json application/vnd.ms-fontobject application/x-font-ttf application/x-web-app-manifest+json application/xhtml+xml application/xml font/opentype image/bmp image/svg+xml image/x-icon text/cache-manifest text/css text/plain text/vcard text/vnd.rim.location.xloc text/vtt text/x-component text/x-cross-domain-policy;
# Uncomment if your server is build with the ngx_pagespeed module
# This module is currently not supported.
#pagespeed off;
location / {
rewrite ^ /index.php;
}
location ~ ^/(?:build|tests|config|lib|3rdparty|templates|data)/ {
deny all;
}
location ~ ^/(?:.|autotest|occ|issue|indie|db_|console) {
deny all;
}
location ~ ^/(?:index|remote|public|cron|core/ajax/update|status|ocs/v[12]|updater/.+|oc[ms]-provider/.+).php(?:$|/) {
fastcgi_split_path_info ^(.+?.php)(/.*|)$;
set $path_info $fastcgi_path_info;
try_files $fastcgi_script_name =404;
include fastcgi_params;
fastcgi_param SCRIPT_FILENAME $document_root$fastcgi_script_name;
fastcgi_param PATH_INFO $path_info;
#fastcgi_param HTTPS on;
# Avoid sending the security headers twice
fastcgi_param modHeadersAvailable true;
# Enable pretty urls
fastcgi_param front_controller_active true;
fastcgi_pass php-handler;
fastcgi_intercept_errors on;
fastcgi_request_buffering off;
}
location ~ ^/(?:updater|oc[ms]-provider)(?:$|/) {
try_files $uri/ =404;
index index.php;
}
# Adding the cache control header for js, css and map files
# Make sure it is BELOW the PHP block
location ~ .(?:css|js|woff2?|svg|gif|map)$ {
try_files $uri /index.php$request_uri;
add_header Cache-Control "public, max-age=15778463";
# Add headers to serve security related headers (It is intended to
# have those duplicated to the ones above)
# Before enabling Strict-Transport-Security headers please read into
# this topic first.
#add_header Strict-Transport-Security "max-age=15768000; includeSubDomains; preload;" always;
#
# WARNING: Only add the preload option once you read about
# the consequences in https://hstspreload.org/. This option
# will add the domain to a hardcoded list that is shipped
# in all major browsers and getting removed from this list
# could take several months.
add_header Referrer-Policy "no-referrer" always;
add_header X-Content-Type-Options "nosniff" always;
add_header X-Download-Options "noopen" always;
add_header X-Frame-Options "SAMEORIGIN" always;
add_header X-Permitted-Cross-Domain-Policies "none" always;
add_header X-Robots-Tag "none" always;
add_header X-XSS-Protection "1; mode=block" always;
# Optional: Don't log access to assets
access_log off;
}
location ~ .(?:png|html|ttf|ico|jpg|jpeg|bcmap)$ {
try_files $uri /index.php$request_uri;
# Optional: Don't log access to other assets
access_log off;
}
}
启动各项服务:sudo systemctl restart nginx php7.3-fpm redis-server mariadb。如果系统安装了防火墙,记得放行80端口;
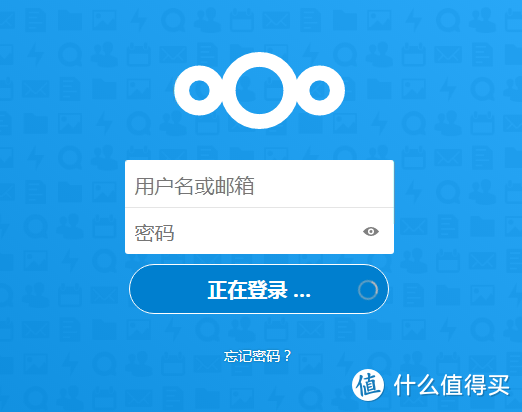
打开浏览器,在地址栏输入树莓派的ip,例如:http://192.168.1.2,将出现nextcloud的设置页面,选择用户名和密码,以及输入数据库用户名和密码,完成设置。

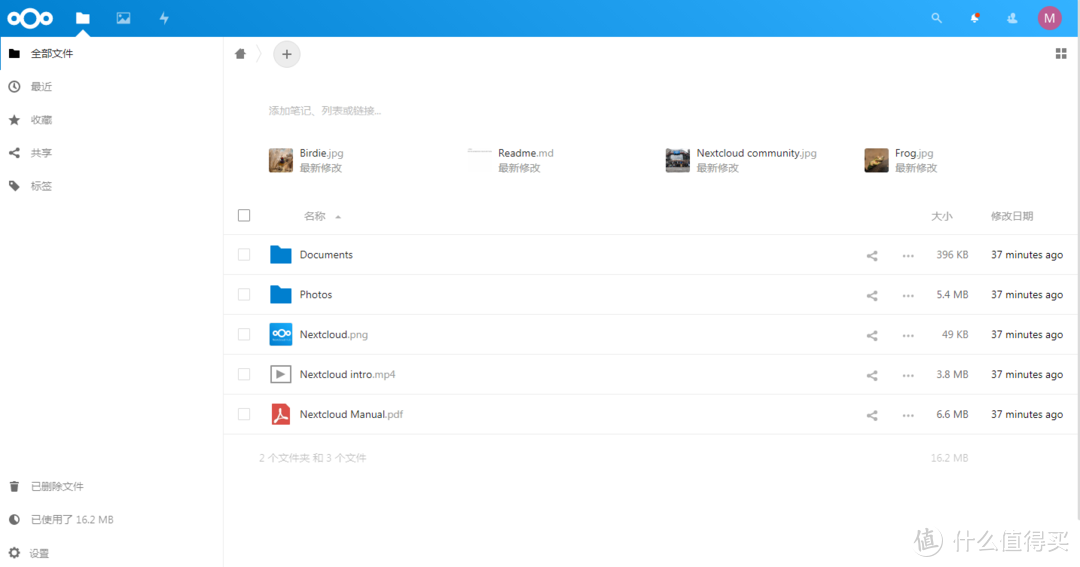
设置完成后,进入了类似百度云盘的操作界面,说明云盘已经初步搭建好了。
配置nextcloud,使其性能更好:打开/var/www/html/nextcloud/config/config.php文件,在最后的);前添加缓存配置: 'memcache.local' => 'OCMemcacheRedis',
'memcache.distributed' => 'OCMemcacheRedis',
'redis' => [
'host' => 'localhost',
'port' => 6379,
'dbindex' => 0,
'password' => '',
'timeout' => 1.5,
],
至此,nextcloud的部署和设置全部完毕,在浏览器界面已经能够查看和管理各种数据和功能了。
其它
树莓派默认的sd卡存储空间很小,实践应该将nextcloud的程序文件托管在外置硬盘上;
设置外网访问需要用到域名、dns、https配置以及内网穿透,本文不再给出,如有需要,将在以后的文章单独说明;
各平台客户端的设置和使用请参考官方教程,本文不再给出














校验提示文案
校验提示文案
校验提示文案
校验提示文案
校验提示文案
校验提示文案
校验提示文案
校验提示文案
校验提示文案
校验提示文案
校验提示文案
校验提示文案