
































 深耕数码兴趣领域















11
20
告别算法推荐!用 Docker 搭建属于你自己的 NewsNow 新闻聚合站
2026-06-02 09:45:21
0点赞
12收藏
0评论
全网热点聚合应用,可一键整合微博、知乎、36 氪、Hacker News 等 30 + 平台热榜,界面极简清爽、实时更新,支持自定义部署与数据同步,帮你高效获取全网热点。
功能特点:
多源聚合:默认聚合 40+ 主流源(含知乎、微博、GitHub 等),一键整合分散资讯,告别多平台切换
用户主权:完全去广告,无算法绑架;支持自定义拖拽排序,由你决定信息来源与呈现顺序
高性能与部署:智能缓存(默认 30 分钟),适配手机 / 平板;支持 Docker 快速部署,可托管至个人服务器或 Cloudflare Pages
添加自定义新闻源,适合监控技术论坛、竞品动态或个人博客更新
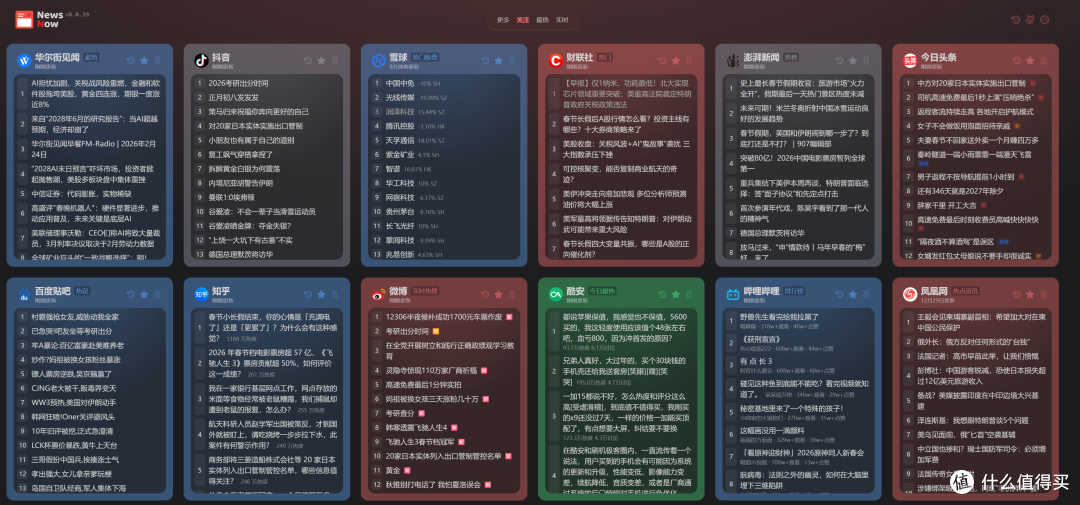 image-20260224110907291
安装部署
1、创建本地目录
mkdir -p /opt/newsnow/data
2、Docker命令安装
下载镜像:
docker pull ghcr.nju.edu.cn/ourongxing/newsnow:v0.0.39
Docker命令启动容器:
docker run -d
  --name newsnow
  --restart always
  -p 8000:8000
  -v $(pwd)/data:/usr/app/.data
  -e TZ=Asia/Shanghai
  ghcr.nju.edu.cn/ourongxing/newsnow:v0.0.39
3、Docker Compose方式部署
cd /opt/newsnow/data
Compose配置:
services:
  newsnow:
    image: ghcr.nju.edu.cn/ourongxing/newsnow:v0.0.39
    container_name: newsnow
    ports:
      - '4444:4444'
    volumes:
      - /opt/newsnow/data:/usr/app/.data
    environment:
      - HOST=0.0.0.0
      - PORT=4444
      - NODE_ENV=production
      - G_CLIENT_ID=
      - G_CLIENT_SECRET=
      - JWT_SECRET=
      - INIT_TABLE=true
      - ENABLE_CACHE=true
启动容器:
# 后台启动(首次启动会自动拉取/构建镜像,耐心等待)
docker-compose up -d
# 查看启动日志(验证是否正常运行)
docker-compose logs -f newsnow
使用教程
1)打开网页即可,默认30 分钟刷新
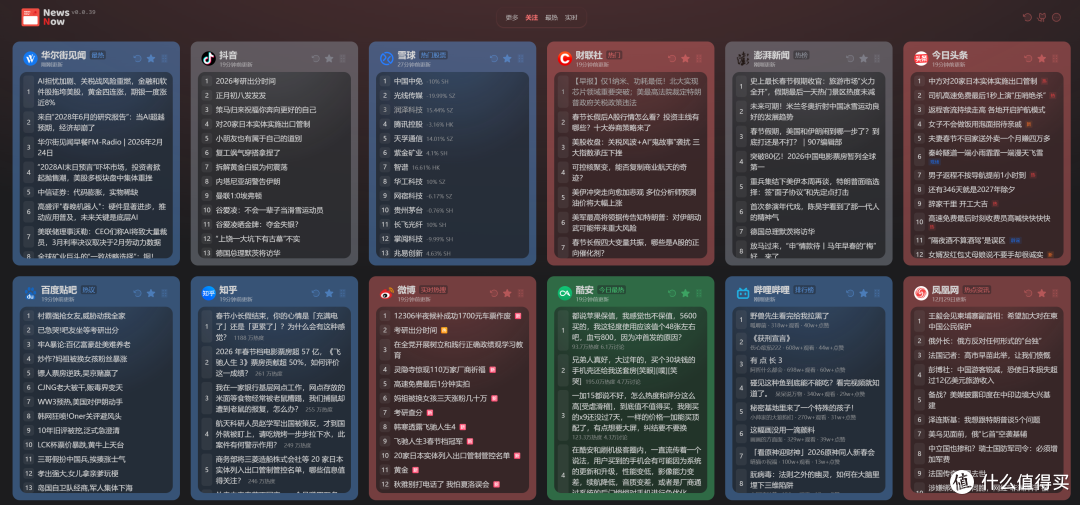 image-20260224112846895
2)将平台添加到关注里,类似收藏夹
 image-20260224113001708
3)搜索平台
点击更多,搜索咨询平台
 image-20260224113219315
4)一些参数设置
项目地址
ourongxing/newsnow: Elegant reading of real-time and hottest news
自定义源设置
想要添加数据源,请关注 shared/sources server/sources,项目类型完备,结构简单,请自行探索
1. 创建特征分支
一定要为你的更改创建一个功能分支:
git checkout -b feature-name
例如,添加一个Bilibili热门视频来源:
git checkout -b bilibili-hot-video
2. 在配置中注册源
将你的新源添加到源配置中:/shared/pre-sources.ts
  "bilibili": {
  name: "哔哩哔哩",
  color: "blue",
  home: "https://www.bilibili.com",
  sub: {
    "hot-search": {
      title: "热搜",
      column: "china",
      type: "hottest"
    },
    "hot-video": {  // Add your new sub-source here
      title: "热门视频",
      column: "china",
      type: "hottest"
    }
  }
}
对于全新的来源,请添加一个新的顶层条目:
"newsource": {
  name: "New Source",
  color: "blue",
  home: "https://www.example.com",
  column: "tech", // Pick an appropriate column
  type: "hottest" // Or "realtime" if it's a news feed
};
3. 实现源源 Fetcher
在目录中创建或修改文件。如果你的源与现有源相关(比如添加新的Bilibili子源),请修改现有文件:/server/sources/
// In /server/sources/bilibili.ts

// Define interface for API response
interface HotVideoRes {
  code: number
  message: string
  ttl: number
  data: {
    list: {
      aid: number
      // ... other fields
      bvid: string
      title: string
      pubdate: number
      desc: string
      pic: string
      owner: {
        mid: number
        name: string
        face: string
      }
      stat: {
        view: number
        like: number
        reply: number
        // ... other stats
      }
    }[]
  }
}

// Define source getter function
const hotVideo = defineSource(async () => {
  const url = "https://api.bilibili.com/x/web-interface/popular"
  const res: HotVideoRes = await myFetch(url)

  return res.data.list.map(video => ({
    id: video.bvid,
    title: video.title,
    url: `https://www.bilibili.com/video/${video.bvid}`,
    pubDate: video.pubdate * 1000,
    extra: {
      info: `${video.owner.name} · ${formatNumber(video.stat.view)}观看 · ${formatNumber(video.stat.like)}点赞`,
      hover: video.desc,
      icon: video.pic,
    },
  }))
})

// Helper function for formatting numbers
function formatNumber(num: number): string {
  if (num >= 10000) {
    return `${Math.floor(num / 10000)}w+`
  }
  return num.toString()
}

// Export the source
export default defineSource({
  "bilibili": hotSearch,
  "bilibili-hot-search": hotSearch,
  "bilibili-hot-video": hotVideo, // Add your new source here
})
对于完全新的源,创建一个以你来源命名的新文件(例如,)。/server/sources/``newsource.ts
4. 重新生成源文件
添加或修改源文件后,执行以下命令以重新生成所需的文件:
npm run presource
这会更新文件和其他必要的配置。sources.json
作者声明本文无利益相关,欢迎值友理性交流,和谐讨论~